
How to Verify a Used Placement Machine Before It Ships
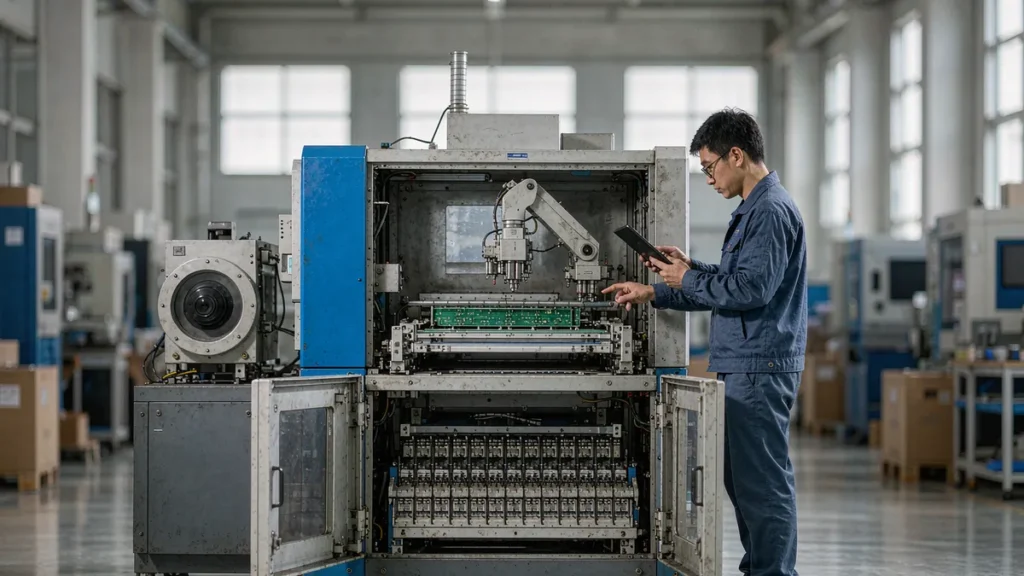
Buying guide · 8 min read
A used placement machine can save you 50–70% compared with new equipment — but only if the machine that arrives is the machine you paid for. Placement machines are precision systems: ball screws, linear guides, vision cameras and feeder interfaces all wear with use, and a machine that looks clean can still hide thousands of hours of hard production.
This guide walks you through the verification steps professional buyers use before a used mounter leaves the seller’s floor — from the paper trail to the packing photos — so there are no surprises at your loading dock.
Start with the paper trail
Before discussing price, ask the seller for five documents. A seller who hesitates here is telling you something.
- Serial number and data plate photo — every subsequent document must match this number.
- Usage history: power-on hours and, where available, axis and laser run-time counters. Placement machines age by hours, not by year of manufacture.
- Maintenance and service records: ball screw lubrication, linear guide service, camera calibration and feeder calibration history.
- Alarm and error history exported from the machine’s own logs — one week of logs tells you more than a month of photos.
- Original purchase invoice and, ideally, the OEM build record: many OEMs confirm build date, original configuration and service visits by serial number.
Cross-check the configuration: the heads, nozzles and feeder count installed today should match what the OEM originally sold. A machine advertised with options the OEM never fitted is a red flag.
Trace the serial number
With the serial number in hand, contact the manufacturer’s local office or authorized distributor and ask three questions: When was this machine built? What was the original configuration? Is there an active lease, lien or finance claim on it? Machines released from bankruptcy or liquidation occasionally carry unresolved finance claims — verifying this early protects you from losing both money and machine.
Verify remotely — live, not recorded
Do not rely on a recorded video; recordings are easy to cherry-pick. Ask for a live video call and direct the camera yourself:
- Cold start: power the machine from off. Watch the boot sequence, how long it takes and which errors appear.
- Main screen: current software version, installed options, and the machine-hours page on camera.
- Alarm log: open the history page and scroll — ask the seller not to clear the logs beforehand.
- Movement: home all axes, run a short dry-cycle program, and watch X/Y/Z motion and camera flight.
- Close-ups: nozzle slots, feeder seats, conveyor rails and belts, and the inside of any covers that are normally closed.
Ask for timestamped photos of the data plate, servo motors and control PC as well — you will compare them with photos taken at packing and again on arrival.
The functional tests that actually matter
A placement machine is more than moving parts. These checks separate a healthy machine from one that merely “spins nicely”:
- Vision system: place a test component (0402 and a fine-pitch QFP if possible) and watch the recognition result and correction offsets. Blurry or unstable recognition usually means camera, lens or lighting trouble — expensive to fix.
- XY accuracy: run a placement accuracy test — a dedicated test board, a bonded-glass kit, or at minimum repeated placements onto a marked target to measure offset scatter. Compare against the OEM’s original accuracy specification, not against “it works”.
- Vacuum and air: with a nozzle installed, hold a component and watch the vacuum reading; check system pressure stability at the machine’s regulator.
- Feeder indexing: mount a known reel, index 20–30 feeds on camera, and confirm consistent advance without slipping or double-feeding.
- Board handling: run rail-width change across your actual board sizes; check conveyor sensors and stoppers.
- Software and options: confirm on screen that the options you are paying for (high-speed heads, tray feeders, odd-form, vision packages) are licensed and installed — not just “supported”.
Third-party inspection is cheap insurance
For machines above roughly USD 10,000, an independent inspection costs a few hundred dollars and removes the biggest risk: trusting the seller’s own word. An inspector — SGS, Bureau Veritas or a local SMT engineer — can verify the serial and configuration on your behalf, run the agreed functional tests, photograph the internals and record an acceptance video.
Make the report a condition of payment. Most professional sellers accept this; the ones who refuse are answering your question for you.
Agree a pre-shipment acceptance test
The strongest protection is a written acceptance test before crating. Agree in advance:
- The test board — yours, if you can send one; otherwise an agreed test panel.
- Pass criteria: placement offset within X µm, no critical alarms during a 30–60 minute continuous run, feeder indexing OK.
- Evidence: a continuous (unedited) video of the run plus exported production and alarm logs.
Pay the balance only after the test is passed. Sellers confident in their machines will agree quickly.
Watch how it is packed
Most transit damage happens because someone skipped steps to save a day. Before crating, require:
- Axis locks or shipping braces installed; Z-axis and camera heads secured.
- Nozzles, feeders and loose parts removed and packed separately, with an inventory list.
- Control PC and monitor packed anti-static, cushioned and transported upright.
- Moisture-barrier film plus desiccant around precision units — essential for sea freight.
- ISPM-15 stamped export wooden case, with the machine bolted to the case base, not just strapped.
- Shock and tilt indicators on the crate for high-value machines.
Get photos of every step. They prove the condition at handover and settle any “it arrived damaged” dispute in minutes.
On arrival: inspect before you sign
Carriers give you a short window — typically 3–5 days for sea freight — to file a damage claim. So:
- Check the shock/tilt indicators before opening the crate.
- Photograph the crate outside and inside while unpacking, with your forwarder present.
- Do not power on a machine that shows impact damage; document everything first.
- Compare serial numbers and the loose-parts inventory against the packing list the same day.
Quick pre-shipment checklist
| Item | What to verify | Red flags |
| Data plate & serial | Photo matches all documents | Plate replaced, inconsistent numbers |
| Usage hours | Consistent with age and price | 24/7 factory hours sold as “lightly used” |
| Alarm history | Exported live on camera | Logs cleared before viewing |
| Vision system | Stable recognition, sane offsets | Blurry image, drifting correction |
| XY accuracy | Test placement within OEM spec | “It runs fine” without measurement |
| Vacuum & air | Stable readings at specification | Pump noise, fluctuating pressure |
| Feeders | 20+ index cycles on camera | Slipping, double feeds, bent seats |
| Software options | Licensed options shown on screen | Options “available for a fee” after purchase |
| Packing | Braces, barrier, ISPM-15 case, indicators | Stretch wrap only, no case |
| Documents | Invoice, packing list, serial list, B/L, insurance | “We will send papers later” |
The bottom line
None of these steps is difficult; skipping any one of them is expensive. A disciplined buyer spends one or two weeks verifying and then enjoys years of production. At THOMAO, every used placement machine ships with photo-verified condition, a serial-traceable history and an inspection report — and we run a live video acceptance with you before anything is crated. Ask us for the verification pack of any machine in stock.